100% QUEBEC RECIPE
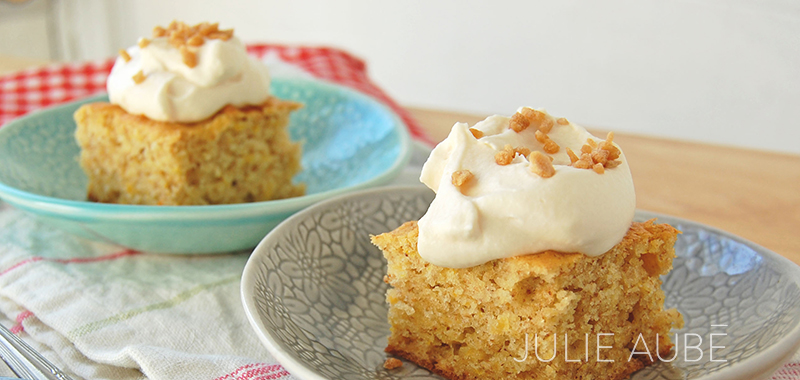
Maple & Rutabaga Cake
Snow is melting, getting more daylight each day; Quebec will soon see its first greenery filling grocery stands. While we wait for our first local harvests, we can still stock up on homegrown root vegetables. After eating lots of braised meals, we can lack inspiration at the end of the season. Here’s new idea to cook one of these vegetables, the rutabaga, in a different and definitely sunnier way. It’s a perfect timing with maple season, to make the rutab’érable cake!
Ingredients
For the cake
- 1 cup unbleached all-purpose flour
- ½ cup whole wheat flour
- 2 tsp baking powder
- ½ tsp salt
- 3 eggs (white and yellow separated)
- ¼ cup softened butter
- ¼ cup of applesauce or mashed squash
- 2/3 cup maple syrup
- 1 cup of shredded rutabaga (about 110 g)
For the maple butter cream
- 1 cup of 35% whipping cream
- ¼ cup pure maple butter
- Pure maple flakes
Preparation
- Line an 8 inch square pan with parchment paper and preheat the oven to 350F.
- In a small bowl, combine flour, baking powder and salt. Set aside.
- In medium bowl, whisk egg whites with an electric mixer. Set aside.
- In a large bowl, combine butter, apple or squash puree, maple syrup and egg yolks with an electric mixer.
- Add grated rutabaga and mix with a spatula.
- Add the dry ingredients alternately with the egg whites to the rutabaga mix, gently folding the dough with a spatula and mixing as little as possible.
- Pour into pan and bake 35-40 minutes, or until a toothpick comes out clean.
- While cooking, with an electric mixer whip the cream until it forms soft peaks. Add the maple butter and whip until the cream is more firm. Place into the fridge.
- Let the cake cool down before unmolding onto a board. Cut into 16 squares, garnish with the maple butter cream and decorate with maple flakes.
Note: The cake and the cream can be prepared in advance. The best is to keep the maple butter cream in the fridge and the cake at room temperature, then cut and garnish before serving.
Recipe and photo by Julie Aubé, nutritionist, editor, author, speaker and leader of delicious agri-food events with "Prenez le champ"!